

In this tutorial I will show you how to create a slip stitch for crochet. If you're new to crochet, you've come to the right place! I am a Craft Yarn Council Certified Instructor who is dedicated to teaching you the the easiest, and most accurate, method possible. On my site, I offer video, photo, and written tutorials.

The slip stitch is commonly used to seam two pieces of a project together. You can cleverly work the stitches to minimize the density of the seams. For example, while completing your join, be sure to work under the back loop only of one piece and the front loop only of the second piece. The bulk of the seam will be on the wrong side your fabric. We also see this stitch used to reinforced the edges of a project. My biggest hang-up when working this stitch is resisting the muscle memory of yarning over. In conclusion, if you've worked up any other crochet stitch in the past, this will be an easy stitch to learn!
Jump to:
📖 About the tutorial
Difficulty:
Beginner
Skills:
Terms:
U.S. Terms
Abbreviation:
The abbreviation for a slip stitch is: sl st
🧺 Supplies
Any yarn and hook can be used to make a slip stitch

🧶 Step-by-step photo tutorial

Slip Stitch
This tutorial details how to create a slip stitch.
Materials
- Any yarn
Tools
- Corresponding crochet hook
- Scissors
Instructions
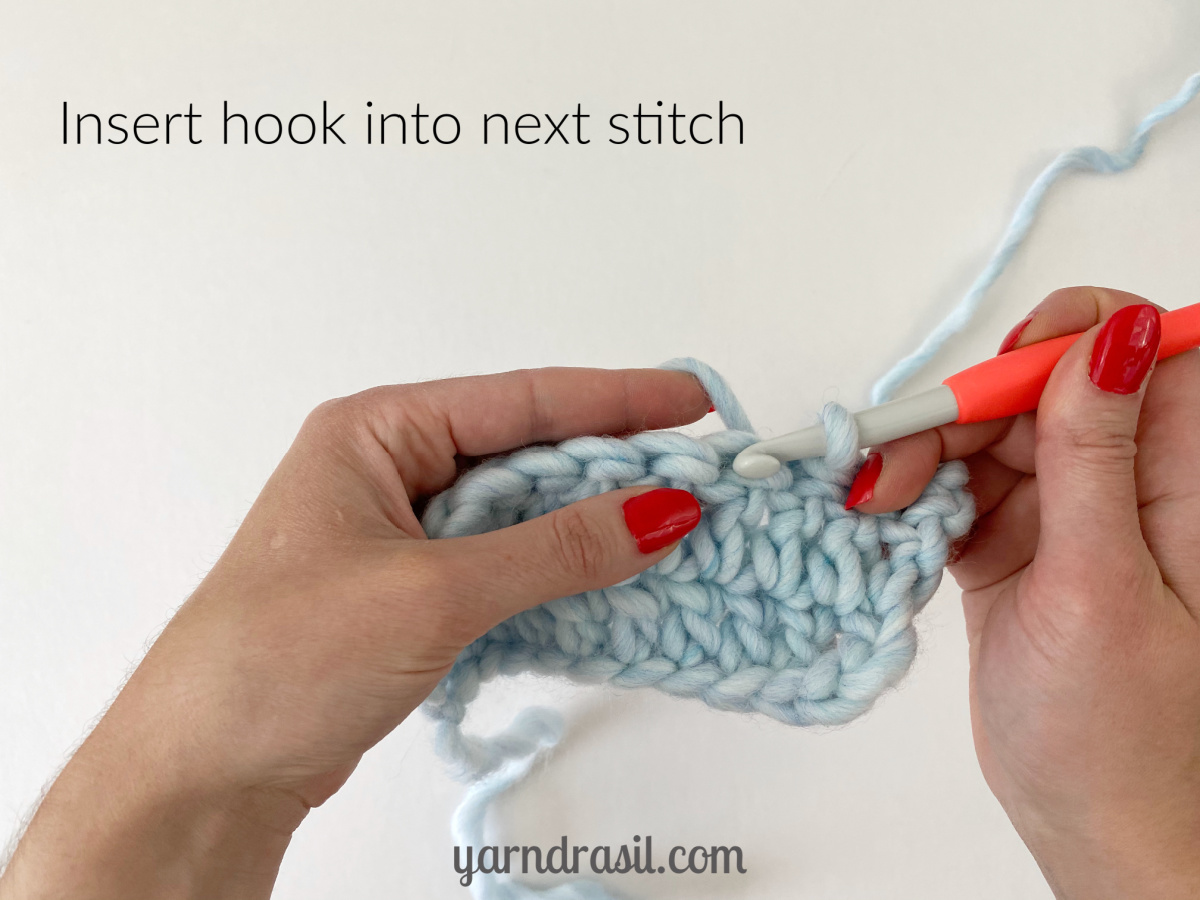
Step 1:
Step 2:

Step 3:

✏️ Chart symbol

📓 Written tutorial
- Insert hook into stitch
- Yarn over
- Pull through stitch and loop on the hook


Leave a Reply