

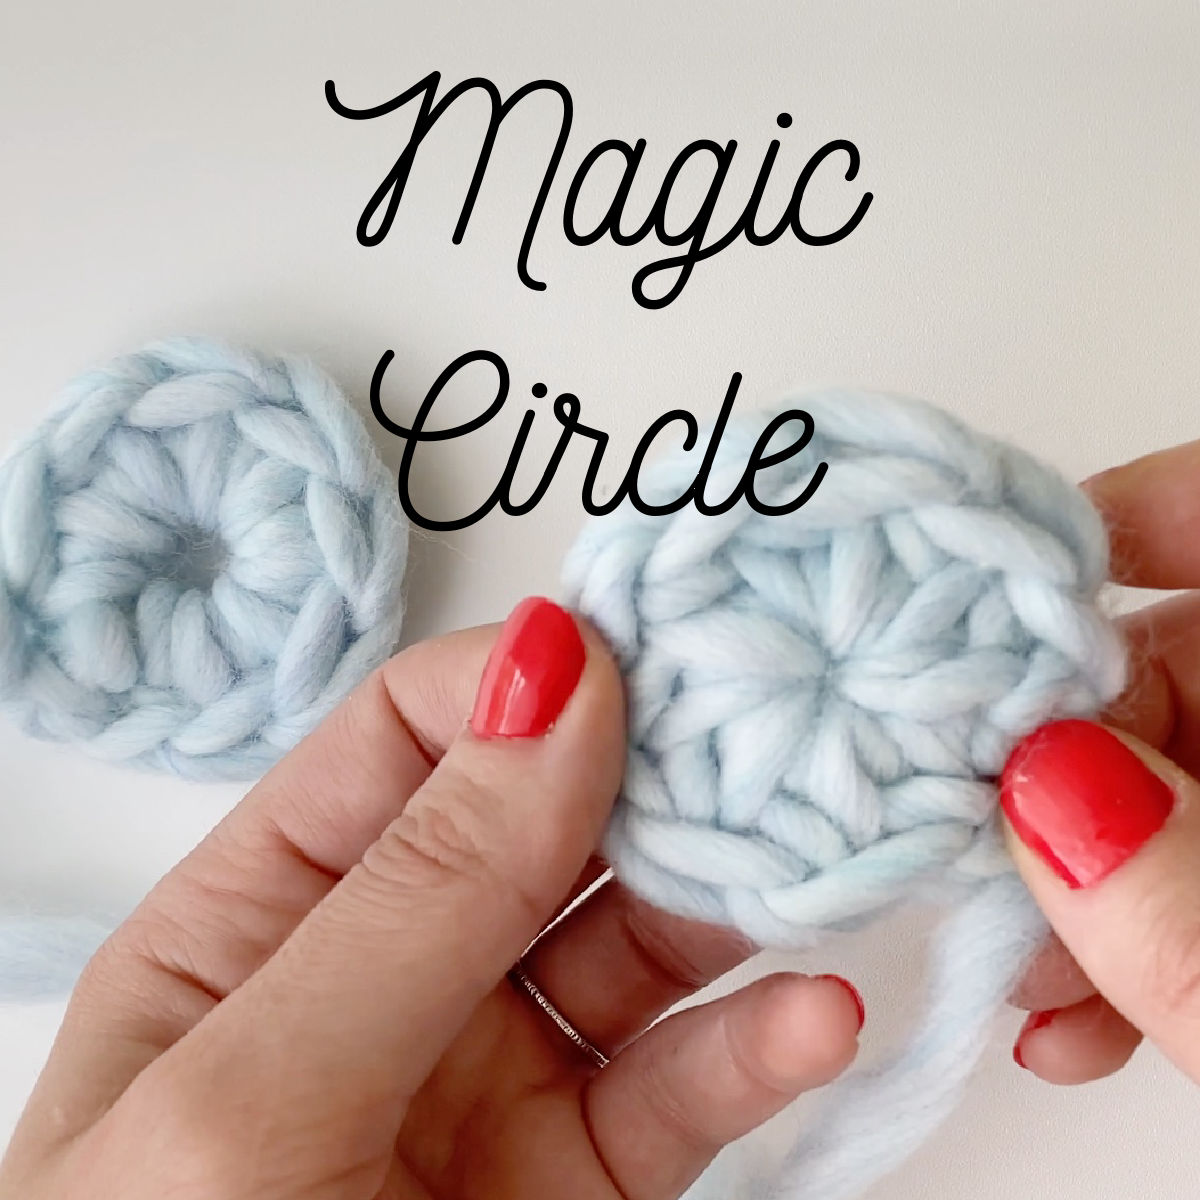
If you're working on a crochet project in the round, you should absolutely be using a magic circle! This is a beginner friendly technique that will allow you to make a circle without any starting gaps. It's perfect for: hats, coasters, bags, amigurumi, and anything else that is worked in the round.
If you start your project in the round with a chain, you are going to have a gap at where you begin. I don't think that anyone likes the look of this!
Using a magic circle fixes this problem. This is because magic circles are adjustable. First, you make the magic circle. Next, you work the stitches in the center of the ring. And then finally, once you've worked a few rounds, you can pull the tail end to tighten the center of the circle. This closes the center entirely.
The technique can be used with any of the basic crochet stitches. Let's look at how magic circles are made!
Jump to:
📖 About the tutorial
Difficulty:
Basic
Terms:
U.S. Terms
Skills needed:
- Chain
- Any basic stitch (single crochet, half double crochet, double crochet, etc.)
Abbreviation:
The abbreviation for the magic circle is typically: mc
Other names for the magic circle:
- Magic loop
- Magic ring
- Adjustable loop
Do you know of another name for this method? Comment below and I'll include it!
Stitch used for example:
In my video tutorial, I am using double crochet as our example. However, this technique can be completed with any of the basic crochet stitches (single crochet, half double crochet, and so on).
If you want to use a different stitch, simply modify the number of turning chains that you create in step 11 of the photo and written tutorials.
🧺 Supplies
This technique works great with most yarns and their corresponding hook.
I have run into issues with chenille yarn. It seems that fuzzy yarn will not properly close when the tail end is pulled. For this reason, chenille yarn is better suited for starting in the round with a chain.

🧶 Step-by-step photo tutorial

Magic Circle for Crochet
This tutorial details how to create a magic circle. This is my preferred method for creating projects in the round. The center of the circle closes completely. There's no comparison to projects created with a chain because they leave a gap.
Materials
- Any yarn
Tools
- Corresponding crochet hook
- Scissors
Instructions
Step 1:

Step 2:

Step 3:

Step 4:
Step 5:

Step 6:

Step 7:

Step 8:

Step 9:

Step 10:

Step 11:

Step 12:

Step 13:

Notes
After round 2 is completed, pull chain to tighten inner circle.
I use single crochet but you can use any stitch you'd like by adjusting the number of chains to the corresponding stitch.
🎥 Video tutorial
📓 Written step-by-step instructions
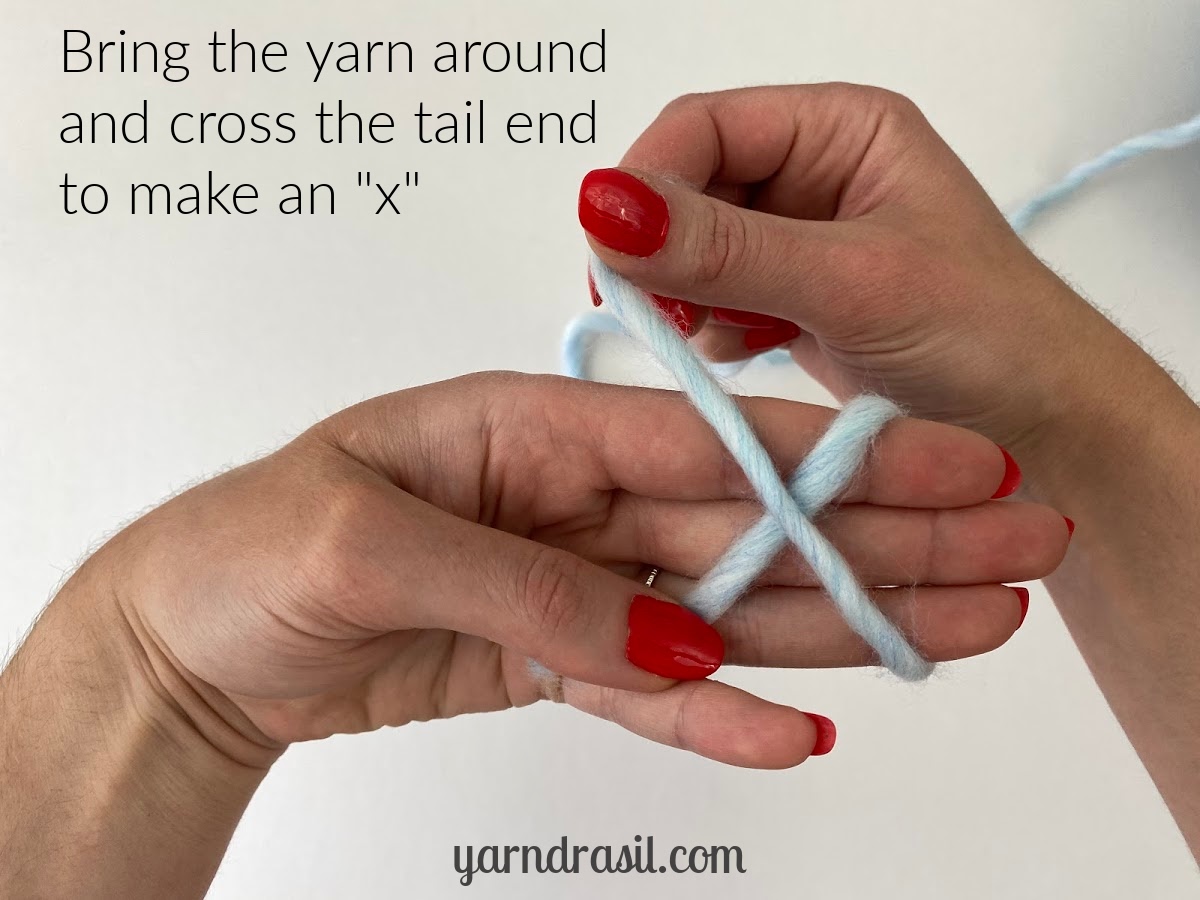
- Drape the tail end of the yarn over the backs of your fingers
- Hold the tail end in place with your thumb
- Wrap the working end of the yarn over the top of your pointer, middle, and ring fingers
- Bring the yarn around the backs of your fingers and cross the tail end to make an "x"
- Securely hold the “x” with your thumb
- Bring the working end over the tops of your fingers
- Snuggly hold the yarn underneath your pinky finger
- Place your hook under the thread on the right
- Hook the yarn on the left
- Pull through
- Chain one to secure (work additional chains if necessary for the stitch you're using in round one)
- Pull the tail end out of the center of the circle
- Work stitches into the center of the circle
- After round 2, pull chain to tighten
💭 Top tips
The chain one you create in step 11 should count as one chain when you move on to completing your turning chains for round one. Adjust your turning chains accordingly.
Don't pull the tail end to tighten until after round 2 is completed. This will make it easier to frog your work, should that be necessary.
I hope you enjoyed this tutorial! If you have any questions, please comment below.


Lynn says
I looked at tons of “magic circle” tutorials. Yours was the first one I understood! So appreciate the BIG yarn, so easy to see and the s-l-o-w visual was genius! Many thanks to you for finally making it ‘click’.
Elissa Jenkins says
Hi Lynn! I'm so happy that you found the video helpful! It makes my day to get comments such as yours. Happy crocheting!
Isabella says
This tutorial is amazing I looked at another one and found it confusing but yours is truly amazing Thank you
Rae Holwadel says
Best explanation of a magic circle I have seen
Ruth says
Thank you for this tutorial,it was really clear, it helped me a lot.
Maria del Carmen says
Tanto tu explicación, como las imágenes, son de una genial simplicidad.
Mientras haya personas como tu, que lo complejo, lo hacen sencillo, podremos, siguiendo tus ejemplos,
tejiendo cosas bonitas!
Muchas gracias!!!
Elissa Jenkins says
Gracias por su amabilidad, Maria!!
Helen Young says
I did it! Big yarn helps greatly. Thank you.