DIFFICULTY:
Easy
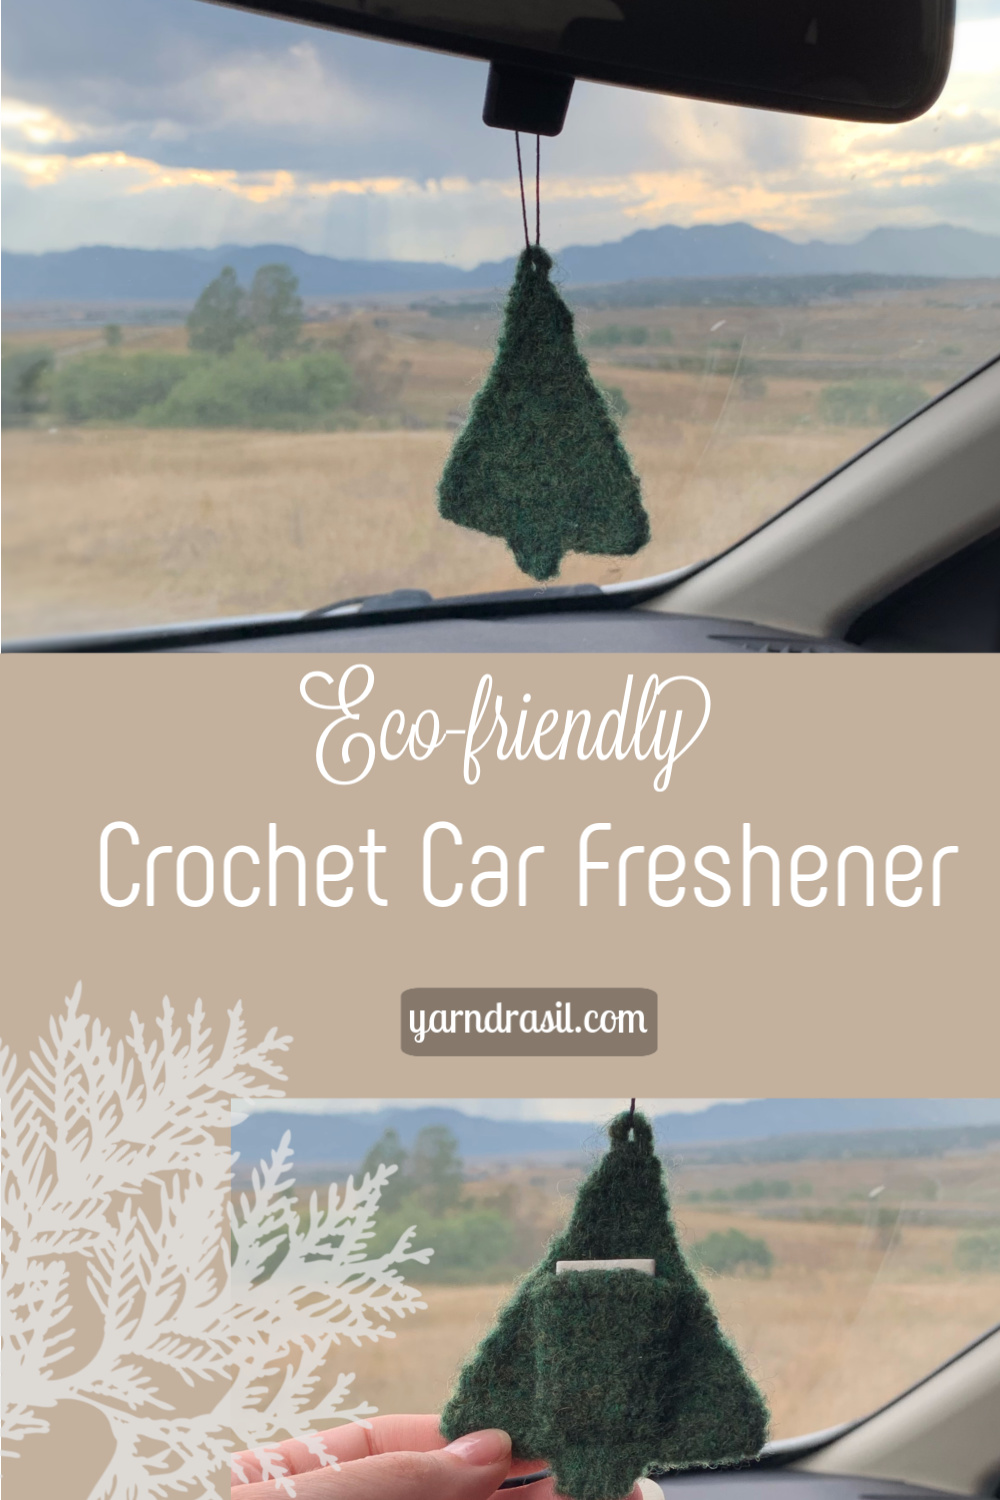
For this crochet car freshener, we'll begin by working up a small tree and a tiny square. Next, we'll attach the pocket by sewing it on. Finally, we'll felt our finished object by using hot water and friction.
Felting is a very simple process so please don't be intimidated! It's really just a matter of getting wool wet with hot water and rubbing it. You can even use your washing machine! However, I prefer to do it by hand because it gives you more control.
I think a lot of people are weary of felting because they've heard that the object shrinks once you're finished. Thankfully, that's no biggie with a home decor item. A garment would be a different story.
It's very important that you use a yarn that is made out of 100% wool. I've heard that some people have great success with 85% wool but I haven't tried this yet. I'd love to do a future post comparing the percentages and the final product. For now, stay on the safe side and just get a skein of 100% wool. I like Cascade 220 because the quality is fantastic and it's still affordable. About $8-10/skein, depending on if you're patient enough to wait for a sale. Whatever you decide, do not use a superwash wool! These yarns are treated to prevent them from felting.
Terms:
U.S. terms
SUPPLIES:
- Cascade 220, Heathers (220 yds/200 m ; 100 g/ 3.5 oz)
- Shire (2445), 1 skein
- Wyndmere, Personal Aromatherapy Diffuser - Refill Pads
- I got a 10 pack at Natural Grocer for $3.49 (and by that I mean tree fiddy)
- Your favorite scent
- Some of you may already have an essential oil that you love. Others of you may have an earthy perfume oil that you like. If you need to buy an essential oil, please be sure not to purchase it from an MLM! A trustworthy brand is Aura Cacia.
- Hook — G-6 (4.25 mm)
- Yarn needle
- Scissors
ABBREVIATIONS:
- st(s) - stitch(es)
- ch – chain
- sl st – slip stitch
- sc – single crochet
- sc2tog - single crochet two together
- sc3tog - single crochet three together
- dc - double crochet
SIZE:
One size
NOTES:
The ch 4 in "Row 19" creates a small loop for hanging the tree up
PATTERN:
Tree
Ch 16, turn
Row 1: 1 sc in 2nd st from hook, 1 sc in each across, ch 1, turn (15 sts)
Row 2: 1 sc in each across, ch 1, turn (15 sts)
Row 3: sc2tog, 1 sc in each of next 11 sts, sc2tog, ch 1, turn (13 sts)
Row 4: 1 sc in each across, ch 1, turn (13 sts)
Row 5: sc2tog, 1 sc in each of next 9 sts, sc2tog, ch 1, turn (11 sts)
Row 6: 1 sc in each across, ch 1, turn (11 sts)
Row 7: sc2tog, 1 sc in each of next 7 sts, sc2tog, ch 1, turn (9 sts)
Row 8: 1 sc in each across, ch 1, turn (9 sts)
Row 9: sc2tog, 1 sc in each of next 5 sts, sc2tog, ch 1, turn (7 sts)
Row 10: 1 sc in each across, ch 1, turn (7 sts)
Row 11: sc2tog, 1 sc in each of next 3 sts, sc2tog, ch 1, turn (5 sts)
Row 12: 1 sc in each across, ch 1, turn (5 sts)
Row 13: sc2tog, 1 sc in each of next st, sc2tog, ch 1, turn (3 sts)
Rows 14 -16: 1 sc in each across, ch 1, turn (3 sts)
Row 17: Sc3tog, ch 1, turn (1 st)
Row 18: sl st (1 st)
Row 19: Begin by working along left side of tree, 1 sl st at the edge of each row, begin working along the bottom edge, sl st in each of next 7 sts, ch 2, dc in same st space, dc in next two sts, ch 2, sl st in same stitch space, sl st across next 6 sts, begin working along right side of tree, 1 sl st at the edge of each row, ch 4, sl st in same sp, fasten off
We're going to be making a small square and sewing it to the backside of the tree. This will hold the aromatherapy diffuser pad.
Ch 7, turn
Row 1: 1 sc in 2nd st from hook, sc in next 5 sts, ch 1, turn (6 sts)
Rows 2-8: 1 sc in each st across, ch 1, turn (6 sts)
Fasten off
Sewing the Pocket On
Stitch the left, bottom, and right sides of the pocket piece on to the wrong side of the tree piece. While sewing, be sure to just catch only the loops that are on the wrong side of the piece. Try to keep away from the front side of the fabric.

Felting:
Now it's time for the exciting part! Felting your crochet car freshener! At this point, the tree is done, the pocket is attached and all of your ends are woven in.
Step-by-step Directions:
- Fill your sink (or a basin) with hot water
- Agitate the fabric by rubbing it together
- After a few minutes, you will notice that the fibers are coming together and that the gaps between the stitches are disappearing
- Take care to felt the piece evenly by making sure that no gaps remain
- Wring out as much water as you can
- Roll the felted fabric with a towel
- Shape and pin the felted piece to a blocking board
- Leave the project in front of a fan to dry
- This is optional. Felt can take a while to dry so the fan moves things along


And there you can have it! Apply several drops of the essential, or perfume, oil on to the diffusing pad, pop the pad into the pocket and voila!


Leave a Reply