

In this post we'll learn how to crochet a scarf. If you're just starting out with crochet, this is a great first project! We'll go over everything: the tools you need, the two stitches that we will be using, and how to make and attach fringe. If this is truly your first project, I recommend using the video tutorial (alongside this post) as your guide.

Jump to:
📖 About the pattern
Difficulty:
Beginner
Terms:
U.S. terms
Abbreviations:
- st(s) - stitch(es)
- ch – chain
- hdc – half double crochet
The video tutorial for this project includes detailed instructions for all of the techniques used. If you'd prefer to learn these stitches via written and photo instructions please follow these links:
Gauge:
4”x4”: 14 hdc x 10 rows
Size:
- Length - 102" plus fringe
- Customizable - This is the length when using nearly the full skein of yarn. If you want a shorter scarf, simply stop crocheting when it reaches your desired length.
- Width - 6.25"
Notes:
Ch 2 does NOT count as a stitch.
🧺 Supplies
- Yarnspirations Caron Big Donut O'Go, (492 yds/450 m ; 300 g/ 10.5 oz)
- Hook — H-8 (5 mm)
- Yarn needle
- Scissors
- Measuring tape (or ruler)
- Book for making fringe
- About 6.5" wide
Gather exactly the supplies listed. Using a different hook size will almost certainly result in incorrect gauge. This means that your fabric will look different.
Because this project is so simple, I recommend using both the free written pattern and the video tutorial. This will help you in learning how to read written patterns. A skill that most beginners find very confusing!

Yarn needles are different from regular sewing needles. They are used for weaving in the tail ends of your project. They have a blunt tip which prevents you from felting the yarn as you work in and out of stitches.
🎥 Video tutorial
🧵 Set aside yarn for fringe
If you want the fringe to match the starting and ending colors of the scarf, then it's important to reserve yarn before you begin crocheting.
Making fringe could not be easier! I wanted my fringe to be about 6.5". First, check your bookshelf and find a book with a similar width. Next, wrap the yarn evenly around the book, making sure to not overlap strands at any point. If you mistakenly overlap the strands, they'll be different sizes.
Once you have the desired amount of fringe, carefully cut along the side of the book.
Here's the equation I used to figure out how much fringe I need:
20 stitches in scarf x 3 lengths of fringe for each stitch = 60 strands for each side of scarf

I always cut a little extra. I've never needed it but it makes me feel better. Shout out to the other people who like to be overly prepared!
Skeins of O'Go allow you to pull yarn from either end. Make sure to reserve yarn for both sides of your scarf.
⛓️ Turning chains
The turning chains do not count as a stitch in this project.
At the end of every row you're going to chain two. The purpose of chaining at the end of a row is to bring the hook, and yarn, to the correct starting position. If you didn't do this, the edges of your project would be pinched and uneven. The number of turning chains, always matches the stitch being used.
In other words, for half double crochet we always work two chains.

When I first started crocheting, I struggled with keeping my edges straight. This is a very common problem for beginners. I would either miss a stitch somewhere along the row or I would add an extra one at the end. This resulted in a few lopsided projects. To help beginners avoid this, I designed this scarf to be 20 stitches wide in every row. This makes it easier for you to double check your work by counting.
If you're struggling, consider buying stitch markers (or using a paperclip) to mark the first stitch you make after chaining two. Simply slip the marker under the top of the stitch once it's completed. This will allow you to visually see the start of the row more easily.
The video tutorial goes over this concept in great detail. However, if you're looking for further clarification, I have a brief tutorial about turning chains.
🎨 Color changes
This yarn is fantastic because it includes five colors in one skein. The easiest way to handle your color changes would be to let them happen naturally. The color change happening in the middle of a row wouldn't be that obvious and going this route would save you a bit of work.
If you want your color change to happen at the start of a row, that's possible too! To achieve this finish the last full row before the color change. Do not complete the final stitch by leaving three loops on the hook.
Making sure to leave a tail of at least 6", cut the yarn. Then cut off any excess of the last used color.
With the new color, make sure to leave a tail of least 6". Yarn over with the new color and pull through the three loops that you left on the hook. This will complete that final stitch with the new color. Finally, chain two and carry on with one half double crochet in each stitch.

You can choose to work over the tail ends for a few stitches, but this is optional.
You will have more tails to weave in at the end of your project, but in my opinion the clean color changes are worth the hassle.

🪡 Weaving ends
If you are familiar with sewing, this will come naturally to you. I also have a tutorial on weaving in ends available.
Whatever you do, don't trust a knot! They will come undone. It's much more secure to weave the ends in using the method described in the above link.
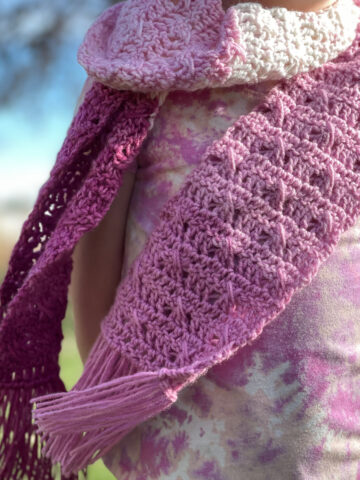
🧶 Attaching the fringe
Attaching the fringe at the end of your project is like icing a cake -- except a heck of a lot easier!
I have a detailed video tutorial that covers this concept.

First, grab three strands of the yarn that we reserved earlier. Then fold those strands in half to create a loop at the midway point. Next, pull that loop through the first stitch along the edge of your scarf. Finally open the loop a bit wider and pull the tail ends through. Gently tug at the tail ends to create lovely finish.
Repeat this process across the edge of the scarf.
📓 Written pattern

Learn How to Crochet a Scarf
The beauty of this project is that you simply stop crocheting when you have worked up the length of scarf that you want. A good frame of reference is that most people want their scarves to be about as long as they are tall.
I prefer long scarves so mine is nearly 9' long!
Gauge:
4"x4" = 12 rows of hdc x 14 sts
Size:
102" long plus 7" fringe or stop when you like the length
Materials
- Yarnspirations Caron Big Donut O'Go, (502 yds/459 m ; 280 g/9.9 oz)
- Raspberry Glazed, 1 skein
Tools
- Hook — H-8 (5 mm)
- Yarn needle
- Scissors
- Tape measure or ruler
Instructions
Set aside yarn for fringe
- Ch 22

- Work pattern:
Row 1: 1 hdc in 3rd st from hook, hdc in each st across, ch 2, turn (20 sts)
Rows 2-243: 1 hdc in ea stitch across, ch 2, turn (20 sts)


Fasten off and weave in ends.
Attach fringe.
Notes
The time listed is an estimate. Actual results vary.
Abbreviations:
ch - chain
hdc- half double crochet
st(s) - stitch(es)
💭 Final thoughts
I hope you found that learning how to crochet a scarf is easy. If not, I am more than happy to answer any questions you have.
I would love to see your finished project, so please tag me via your favorite social media @yarndrasil . Happy crocheting!


Leave a Reply