

What exactly are finishing needles? You've found the Susan Bates needles and now you're wondering, are they worth it? I first discovered these while bopping around Joann Fabrics. They flew under my radar for ages but I was immediately intrigued. Upon googling them, I discovered that they're very popular and well-loved. Let's begin by looking at what they are and how they're different from traditional blunt yarn needles.
What are they?
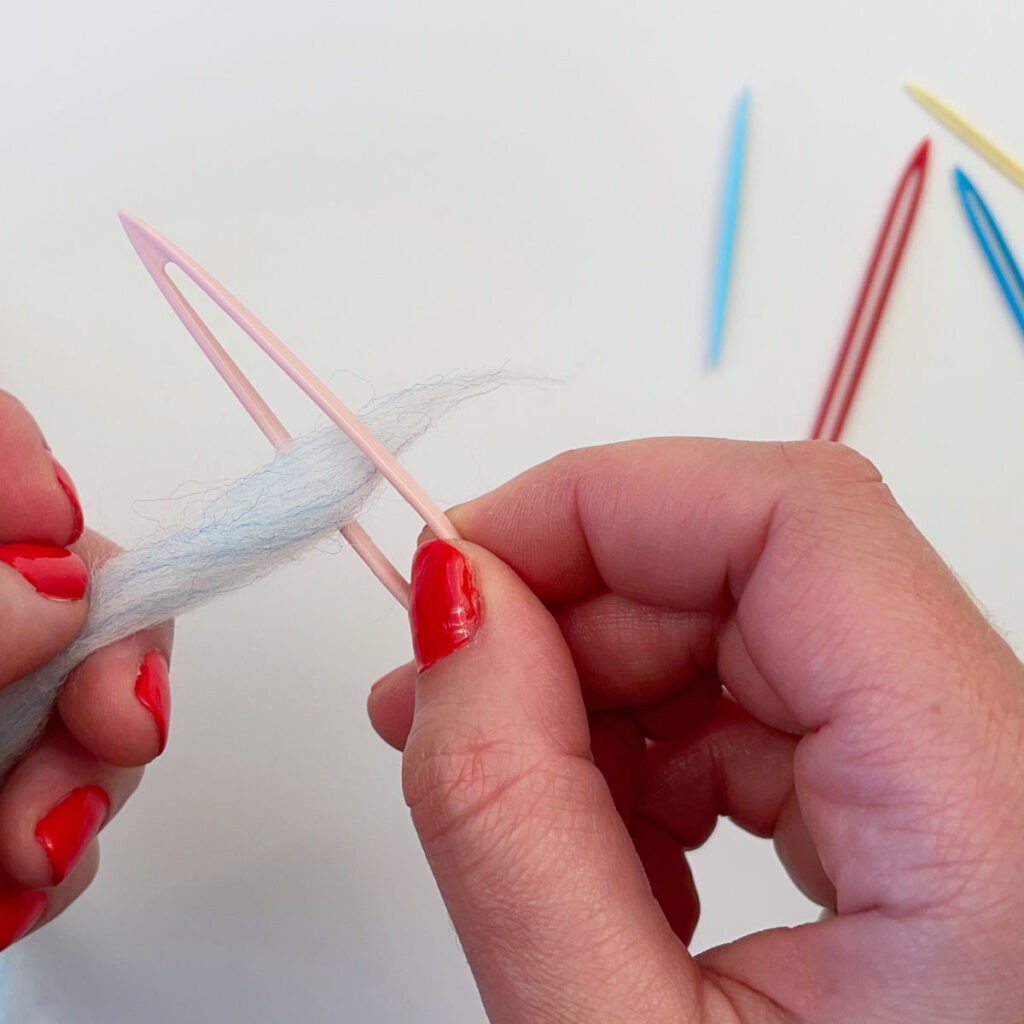
Large eye
These finishing needles were designed with the intention of making weaving in your ends easier. The first thing you'll notice is that eye is the length of the entire needle. This serves a couple different purposes. First, is that it makes it incredibly easy to thread the yarn through the needle. I like the convenience of this. I know that some people, especially those with vision or arthritis issues, can sometimes struggle with threading a needle. That means for some, the large eye is more than a convenience.
The large eye also makes it easier to weave in the ends of short tails. How? Because the yarn can sit at either of the pointed ends. This is achieved by sliding the yarn to the preferred side. This means you won't have to wrestle with a tail that's too short, coupled against a needle that needs to move up and down at a sharp angle. This also means that you can weave the entire length of the tail.
Pliable body
Another thing I noticed about these finishing needles is that the body of the needle is pliable. This means that as you weave, less force is being put through the body of your stitches. The needle is responding to the pressure of the stitch, as opposed to the needle stretching the stitches open to accommodate its size.
I found myself surprised at how sharp the ends of the needles are. Because of this, I was expecting them to consistently split the yarn. I haven't encountered this yet. That being said, I would exercise caution when weaving in the ends of a wool yarn. If you accidentally split the yarn, it may felt a bit -- which would create a big ol' mess.
These needles come in a pack of 5. They range in size and can accommodate any yarn weight. Personally, I find the yarn weight key on the bottom to be a bit silly. You will recycle the packaging and then be left without it. What you end up doing is eyeballing what size, and color, needle you need.
Detailed Video Review
Are they worth it?
Yes, especially for the low cost of about $5. I like them. I will use them if they're nearby. Will they be the only needles I use? Nah. But a tool that aims to make weaving in ends easier, deserves a bit of praise.
If you are the kind of person who is always playing yarn chicken, you need these. I have seen a ton of posts online of people who have "won" yarn chicken and they've only got three inches of tail left. These needles mean that you might actually have enough of a baby tail to weave them in.
Have you tried these needles out? Let me know what you think of them by commenting below!


Leave a Reply